Today I will show you how to draw a cute little crab. This tutorial is intended for kids but if you are beginner this tutorial will help you too. You can find all steps of the drawing in the steps tab. Have fun!
Crab Drawing Tutorial Steps
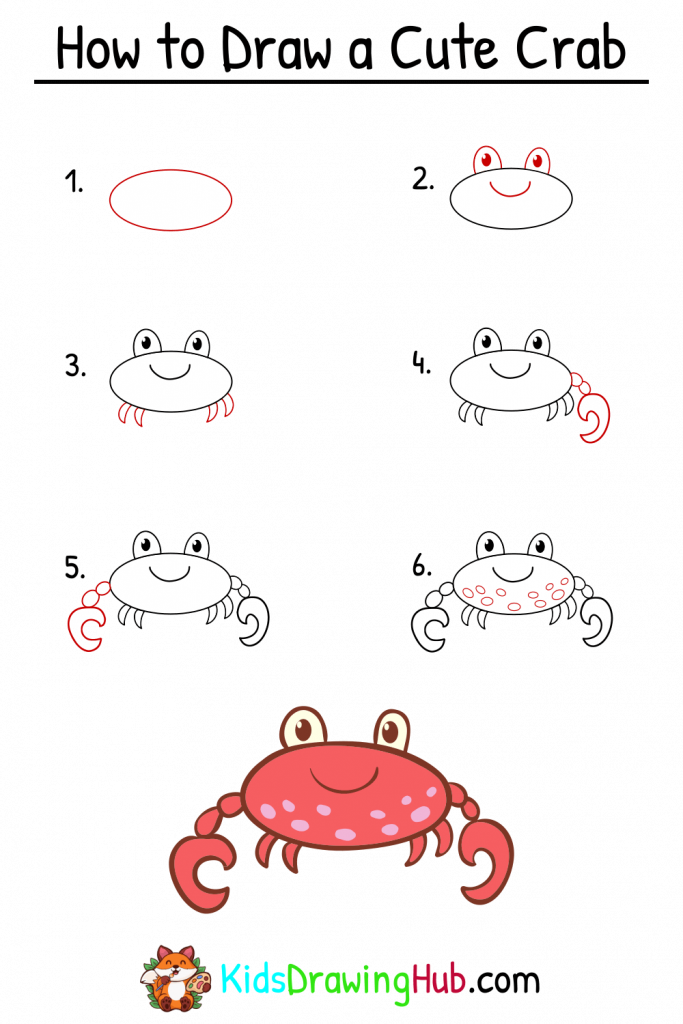
To start drawing a crab, begin with the body. Draw a medium-sized circle to represent the crab’s main body. Then, add two smaller circles on top of the body for the eyes, and two more circles underneath the body for the crab’s claws. Draw two small circles inside each eye to represent the pupils, and add curved lines underneath the eyes to represent the crab’s antennae. Next, draw two large, curved lines coming out of the top of the body to represent the crab’s legs. Add smaller, curved lines coming out of the sides of the body for the crab’s other legs. Finish the legs by adding small ovals at the end for the crab’s claws.
Once you have the basic shape of the crab, you can add more details to make it look more realistic. Draw small spikes or bumps around the edges of the crab’s body to represent its shell, and add shading to give the shell more depth. Draw small lines on the legs and claws to represent the joints, and add texture to the claws to make them look more like pincers. Finally, add shadows and highlights to the crab to give it dimension and make it look more three-dimensional. With a bit of practice, you’ll be able to draw a realistic and detailed crab that’s sure to impress!